
BobBlast 192 – “Wine Bottles – Starting with 3 Easy Strokes.”
“Wine Bottles – Starting with 3 Easy Strokes.”
Welcome Back to Another BobBlast!
This demo is an assignment from my Loosen Up with Aquamedia Painting workshop. I developed this workshop over 20 years ago – it is my flagship workshop, designed for beginners and experienced painters who are stuck in a style and just need to loosen up!
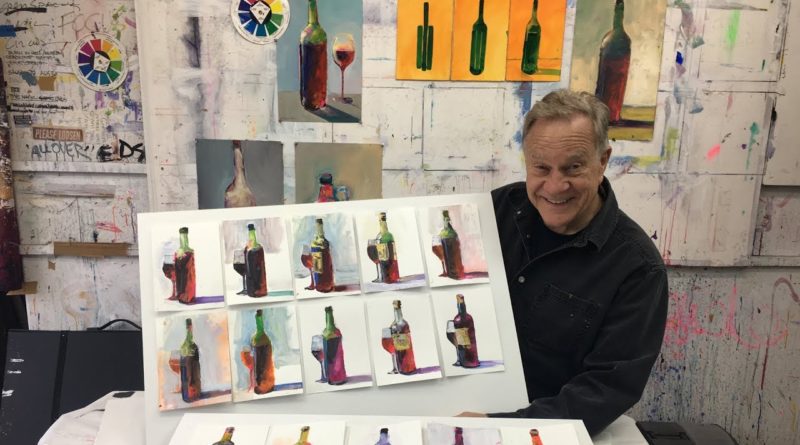
From my Loosen Up Workshop… of one many subjects, here is my demo of Painting a Wine Bottle, starting with 3 Easy Strokes.
First, I brush gesso (acrylic white primer) all over the surface. The gesso goes on one side only. I prefer Utrecht’s Professional Gesso. I am using 300 lb watercolor paper. My favorite watercolor paper is either Fabriano or Kilimanjaro, from Cheap Joe’s.
Next, I brush or wipe on a warm mid tone color all over the surface of the watercolor paper. For this demo, I am using Holbein’s Acrylic Marigold. Let dry.
Buy It
The bottle shape is created with three vertical lines next to each other, the center line slightly longer to represent the neck of the bottle.
Then I add the radius – top and bottom of the bottle, blending the curves with an opaque background color – all the while re-drawing and re-shaping the initial drawing.
Next – the wine! Using a red color as the wine and a kelly green for the glass. I paint highlights, deciding where to put the bright spots of color for that added sparkle. Practice with full, half-full and empty bottles!
Save the empties – They make great models!